ESL - Extensible Shading Language

Homepage - Examples - MyShader.esl


Examples

This page contains a number of ESL example materials, most of which are shader graphs created in the ESL_Designer (a visual editor for ESL shader graphs). As a quick note of reference, ESL is broken into classes which defined node types, and the shader graph which connects instances of these classes to make a complete material. All examples are based on the myshader.esl example classes. While the first few examples gives a quick overview of the language, most of the examples will simply explain how the nodes are connected to create the effect.

Many of the examples below will have a 'Designer File' listed, this is an XML file which you can download and open in ESL_Designer, although if it's listed here it's probably already in your 'example/' folder. Once in the Designer, you can export it to an Fx file and view it with FxViewer.exe . Some of the samples will include an 'HLSL' file as well, this is the compiled output of the Designer so that you can see how the code is reinterpreted.

Designer File

This is roughly the simplest shader you can write in ESL. It declares a new class (or shader graph node type) which adds the IMaterial modifier (this modifiers lets the compiler know that this is a compile-able material). The first three properties define shader inputs; �user� means it�s a per node instance input, and �app� means it�s an application shared defined input. In ESL, all class members are either inputs or procedural properties, ProjectedPosition is not a member variable, but is rather a procedural value written in a sort of short-hand. The IMaterial modifier, used by the compiler to create the shader, declares two abstract properties �FinalPosition� and �FinalColor� which are the vertex and pixel shader outputs respectively, in this material we override them and set them equal to something useful..

class HelloShader adds IMaterial
      <description="A very simple shader.">
{
      app float4x4 ProjMatrix : PROJECTION_MATRIX;
      user attrib float4 RawPosition : POSITION <uitype="position_model">;
      user float4 AmbientColor <uitype="color">;
 
      float4 ProjectedPosition = mul( RawPosition, ProjMatrix );
      override float4 FinalPosition = ProjectedPosition;
      override float4 FinalColor = AmbientColor;
}
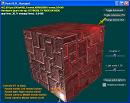


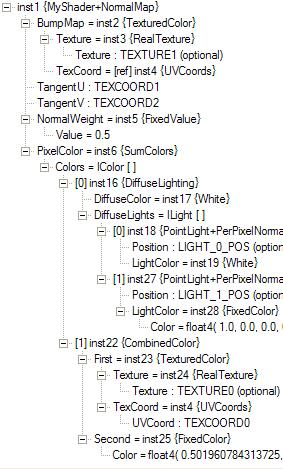
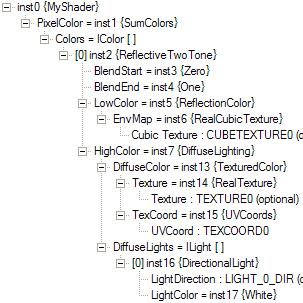
ESL is a fundamentally graph based language, shown to the right is an object graph which generates the shader seen above. This graph was created in the ESL_Designer visual editor. The node type names (in { } braces) are the names of classes from myshader.esl, and the subitems are editable properties of those classes. In this way you can see exactly which code was used to create the final shader.

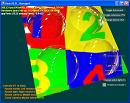
This example demonstrates bump-mapping in ESL. The only difference is the addition of the "NormalMap" modifier to the base MyShader class. This lets you select a texture which is sampled to get the bump-value, two tangent vectors (as per-vertex attributes), and a normal weight which can be used to push the bump normal in the direction of the vertex normal (smoothing out the bump-mapping if less than 1).

An interesting note in this shader is that the UVCoords object is referenced as both the bump-map texcoord and the base texture texcoord. Reusing nodes within the graph can often improve performance as the values are only calculated once.

I should meantion that this isn't the most flexible bump-map representation but it's easy to impliment and does a pretty decent job.

Classes - Designer File


This effect is somewhat like looking into a pool of water. The first color is a TexturedColor which samples a texture at the current screen UV coordinate, and adds a small refraction value to the coordinate. If the texture being sampled contains the screen behind the object this will create a glass-like turbulance (like 'invisable' characters in games).

Then the reflection color is calculated using an environment map and blended with the refracted color based on the reflection direction so that it can only be seen around the edges. This is similar to how water only reflects light when viewed at a steep angle.

Classes - Designer File


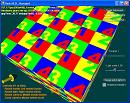
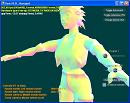
This is a somewhat more practical shader, which doesn't use per-pixel lighting. Rather it does a two-tone blending between the diffuse lighting color and an environment map.

You'll notice no explicit meantion of where the computations should be done, rather the compiler implicitly derives it from hints in the ESL code. In this way most code can be written in a general sence and then adapted as needed. Any code can explicitly push itself into a perticular shader and the compiler respects this, so that the developer has control when it is needed. 


This is the same shader as above, except the GreyScale modifier was added to the base PixelColor object. Here is the very slightly modified graph and XML file.

Classes - Designer File - Fx File


One of the key features of ESL is that the material graph once created by the artist can be modified by the game engine and compiled in different forms (for different pass/LODS/etc.). For instance texture cropping can be introduced which allows a subsection of a texture to be referenced as a full texture. In this case a the UV coordinates are tiled three times, but the texture is cropped so only the middle of the image is seen and that part part is tiled.

Ideally, an engine could compile a shader, see which textures it references, put all or a few of these into a one larger texture and then modify the shader code to sample cropped sections of the larger texture. This could all be done automatically at content build time and shows the kind of code manipulation which would be useful for an engine.

Also, the CroppedUV modifier in MyShader.esl is a good example how to force an operation into the pixel shader (cropped texture coordinates cannot be linearly interpolated and thus should be calculated on a per-pixel basis).

Classes - Designer File


Differed Rendering

Flexibility at compile-time is one of ESL�s primary design objectives. Below are two modifiers which can be applied by the engine at compile time to create differed shaders. The first replaces the final pixel color with the normal direction, and the second replaces the normal direction with a texture sample at the current screen coordinate. In this way two shaders can be generated, one to fill the differed normal texture and another which uses it. These modifiers can be applied to any of the above materials, or any materials deriving from MyShader for that matter. In this way, ESL hopes to enable engine and game developers to do massive reorganizations and performance explorations with their game in a simple and clean manner. Current generation shading languages would require you to rewrite massive portions of code to allow such changes.


modifier OutputNormal extends MyShader
{
����� //convert normal from [-1,1] to [0,1]
����� float4 NormalColor
����� {
����������� float3 n = ( Normal * 0.5 ) + (1.0).xxx;
����������� return n.xyz0;
����� }
 
����� //write the normal color as the pixel color:
����� override float4 FinalColor = NormalColor;
}
 
modifier UseDifferedNormal extends MyShader
{
����� //Put the differed normal texture in here:
����� user texture float3 DiffNormalTex(float2 coord);
�����
����� //Sample the differed normal texture based on the
����� //��� current screen position. Scale from [0,1] to [-1,1]
����� float3 DiffNormal
����� {
����������� float3 n = DiffNormalTex( ScreenPosition );
����������� return ( n * 2.0 ) - (1.0).xxx;
����� }
�����
����� //Use that sampled normal in all lighting code:
����� override float3 Normal = DiffNormal;
}


Numerous Examples

A number of example shaders not really worthy of individual sections

Description Pic Graph Designer File Fx File
Simple diffuse and texture Pic Graph XML Fx
Diffuse and specular Pic Graph XML


Copyright 2006 Lewey Geselowitz